%20Square%20(1).png?width=190&height=189&name=Logo%20Solid%20(Green%20on%20Violet)%20Square%20(1).png)
Why do we need to do this?
Marking an exam allows a teacher to provide feedback to their students for the exam that they have completed online via ExamSimulator (see here for how to mark a printable exam). Marking the exam online provides detailed feedback for the student and their teacher, breaking down their marks by question, topic area and skill area.
What comes before?
You must be a Teacher, HoD or Admin on the site. A group you teach must have been set an 'assessed' or 'practice' exam assignment which has now closed. The exam will have closed either because the due date has passed or because all students it was assigned to have completed the exam.
This exam could have been set by yourself, another teacher in the group, a 'HoD' or 'Admin' on the site. See here for how to set an exam.
Marking the exam
- Login to your account and click on the 'Assignments/Exam' button at the top of your page.
- Click on the 'Exams' tab.
- Click on 'Past exams'.
- Select 'Not marked'.
- Click on the exam you wish to mark.
- This will open up the exam assignment, with a list of students who were assigned the exam below. Here, you will be able to see the students who have completed the exam. These students will have the status 'Mark exam". Any students who did not do the exam will be flagged as 'Missed!'.

- Click 'Mark exam' next to the first student. This will open up their exam paper at the first question.
- You can choose to mark by student (marking their full exam paper at once) or by question (marking all responses for the same question at a time).
- If you choose to mark each student's full paper, you can navigate each question on the left-hand side panel, clicking on each numbered question. If you choose to mark question by question, you can navigate backwards and forwards between the students, by clicking the 'Previous Student' and 'Next Student' buttons at the bottom of each question.
- In the student's answer, you will see some areas highlighted in yellow. These are aspects of the response that machine learning has deemed as potentially correct - this means that they have been matched with elements of the mark scheme. The mark scheme is displayed in the right-hand panel and the marking guidance can also be accessed from here by clicking on the 'Marking Guidance' button.
- If you agree with the highlighted marks, click the green 'accept all highlighted' button. This will open a green box, linking the answer(s) to a particular marking point, where you can choose to write a comment.
-gif.gif)
- If you agree with some of the marks, you can choose to accept these by clicking on the highlighted text. This opens a marking panel. The buttons work as follows:

- You can manually select other areas of the student's answer (that has not been highlighted) by simply selecting a part of the response. This will open the same marking panel as above. Note, you will need to assign the response to a particular marking point.

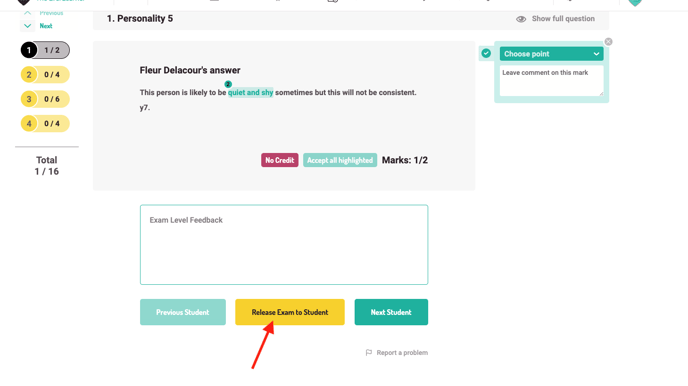
- If you do not wish to assign any marks to the student's answer, click the red 'No Credit' button.
- In the green box entitled 'Exam level feedback', you can add overall feedback for the student on their performance.
- Once you have finished marking a student's exam, a yellow 'Release Exam to Student' button will appear at the bottom of the marking window. Clicking this button will release the exam to the student, which notifies the student that their exam has been marked and that feedback is available. You can 'unrelease' an exam at any point, should you wish to edit your marking or feedback. See here for how to unrelease a marked exam.
- See this article here for how feedback is displayed for both you and the student.
- The students' exam will now appear in both the teacher and the student dashboards.