👩🎓 Assigning teachers to an existing group
In this article we learn how to assign teachers to an existing group.
Why do we need to do this?
Assigning a teacher to a group enables the teacher to access the content of the course(s) the group is studying. It also enables the teacher to set and track assignments and track students' activity.
Who can do this?
● Head of Department
What should I have done before?
● You must have created the group.
● You must have created teachers as users.
● You could have assigned course(s) to the group¹.
● You could have assigned student(s) to the group².
Steps
- You must be logged in and be a school admin or Head of Department.
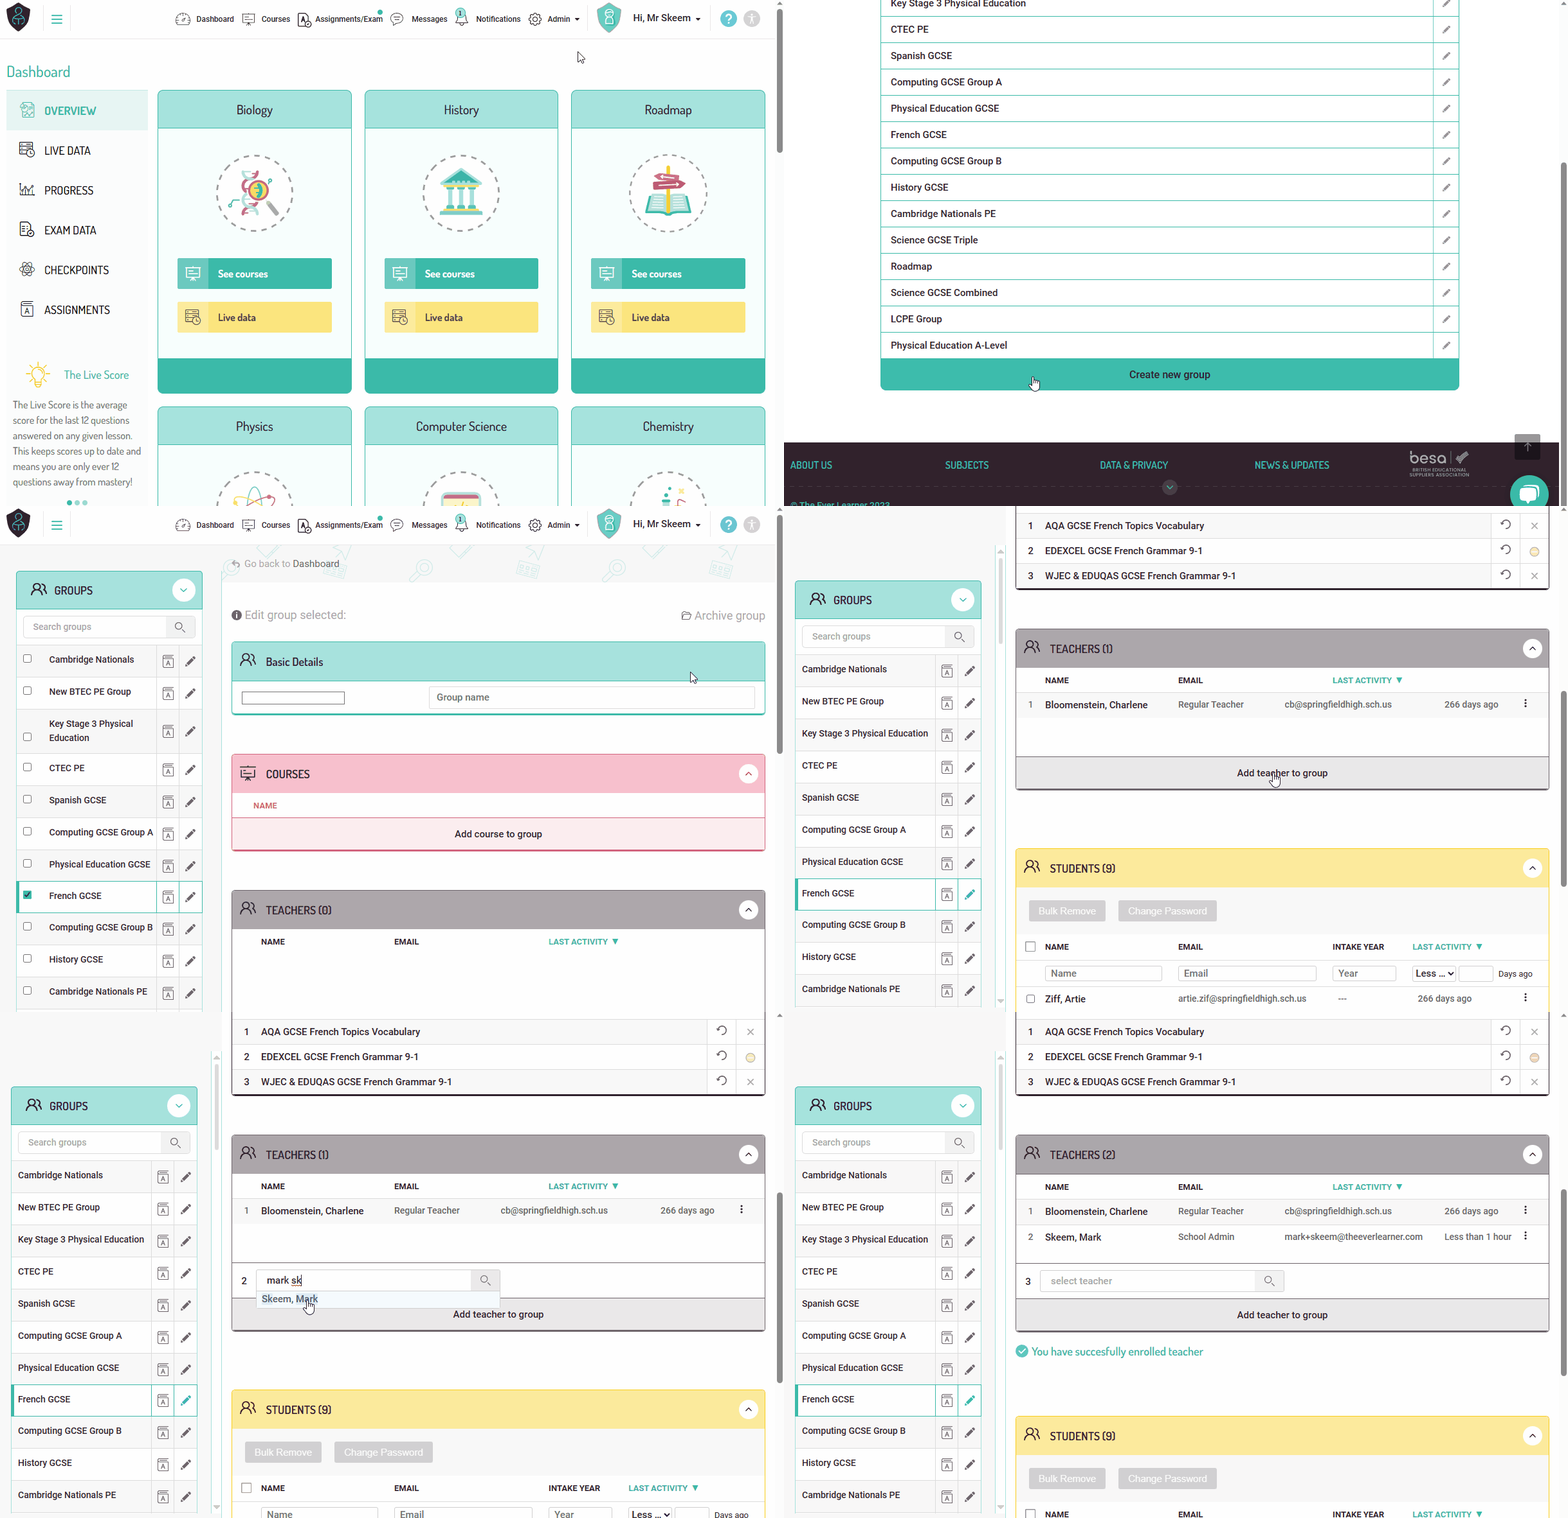
- Choose 'Admin > Groups'.
- Choose the group to which you wish to assign the teacher by clicking the pencil icon next to the group name.
- Scroll down to the grey 'Teachers' panel.
- Click 'Add teacher to group' - a search bar appears.
- Click in the search bar.
- A list of the teachers not currently assigned to the group appears together with their assigned curricula (not school admin).
- Find the teacher in the list and then click on the teacher to add them as a teacher for the group.
- If the list of teachers is long, start to type their name and then click on them when they appear to add them as a teacher for the group.
- Repeat this to add all teachers to the group.

Adding teachers to groups can also be done as part of the group creation process, as long as the teacher accounts are in the system at that point.
Notes
¹ Without an assigned course, neither the students nor the teacher will be able to access the content of that course.
² Without students assigned to the group, they will not be able to access the contents of any course assigned to it.
%20Square%20(1).png?width=190&height=189&name=Logo%20Solid%20(Green%20on%20Violet)%20Square%20(1).png)