👩🎓 Assigning students to an existing group
In this article we learn how to assign students to an existing group.
Why do we need to do this?
Assigning students to a group allows them to access the contents of the course(s) they need to study. Without doing this, the students cannot free learn or engage in assignments set by a teacher.
Who can do this?
- Admin
- HoD
What comes before?
- You must have created the students as users.
- You must have created the group.
- You could have assigned course(s) to the group¹.
- You could have assigned teacher(s) to the group².
Steps

- You must be logged in and be a school admin or head of department.
- Go to Admin > Groups.
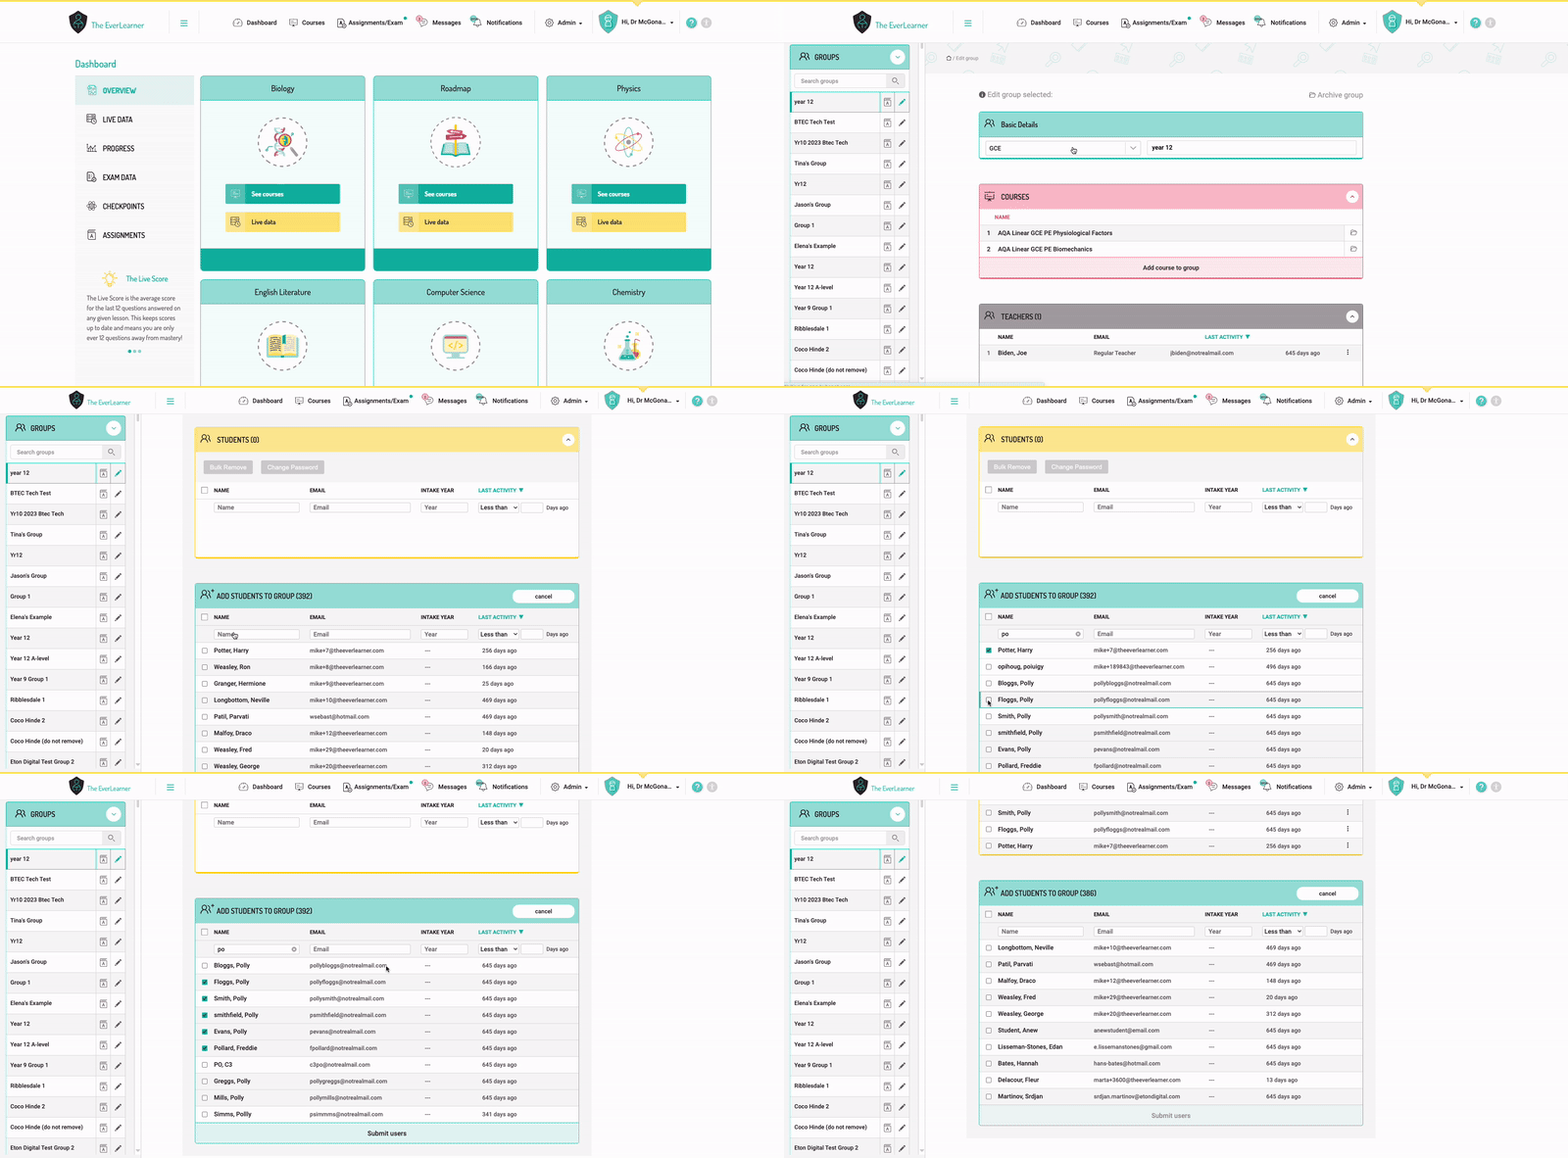
- Choose the group you wish to assign students to by clicking the pencil icon next to the group name.
- Scroll down to the yellow 'Students' panel and click 'Add students to group'.
- A green panel will appear underneath the yellow panel. This will list all students in the school/department who are not currently assigned to this group. If no students are listed here, then they have not yet been added to the site. Please go back and create your students' accounts.
- Choose the student(s) you wish to add to the group from the list, ticking the square next to their name. You can sort the list by 'Name', 'Email', 'Intake Year' or 'Last Activity' and filter using the filter boxes.
- If you can’t find the student in the list but are certain they’re registered on the site, they are likely already in the group. To confirm, try searching for their name using the search bar at the top of the yellow panel.
- Once all the students have been selected, click the 'Submit users' button at the bottom of the green panel.
Adding students to a group can also be done as part of the group creation process as long as the student accounts have been created in the system beforehand.
Notes
¹ Without assigning a course to a group, your students cannot free learn or take assignments.
² Without assigning teachers to a group, there will be no one to monitor their progress or set them assignments.
%20Square%20(1).png?width=190&height=189&name=Logo%20Solid%20(Green%20on%20Violet)%20Square%20(1).png)