👩🎓 Managing users
In this article we learn how to manage and edit user details on The EverLearner platform.
Why do we need to do this?
- To update student and/or teacher details and passwords.
- To be able to archive teachers and/or students.
Who can do this?
- Admin
- HoD
- Teacher (a teacher can only edit student details)
What comes before?
Users must be uploaded to the site first. See how to create student accounts and how to create teacher accounts.
Managing teachers:
See here for managing students.
- You must be logged in and be an Admin or HoD.
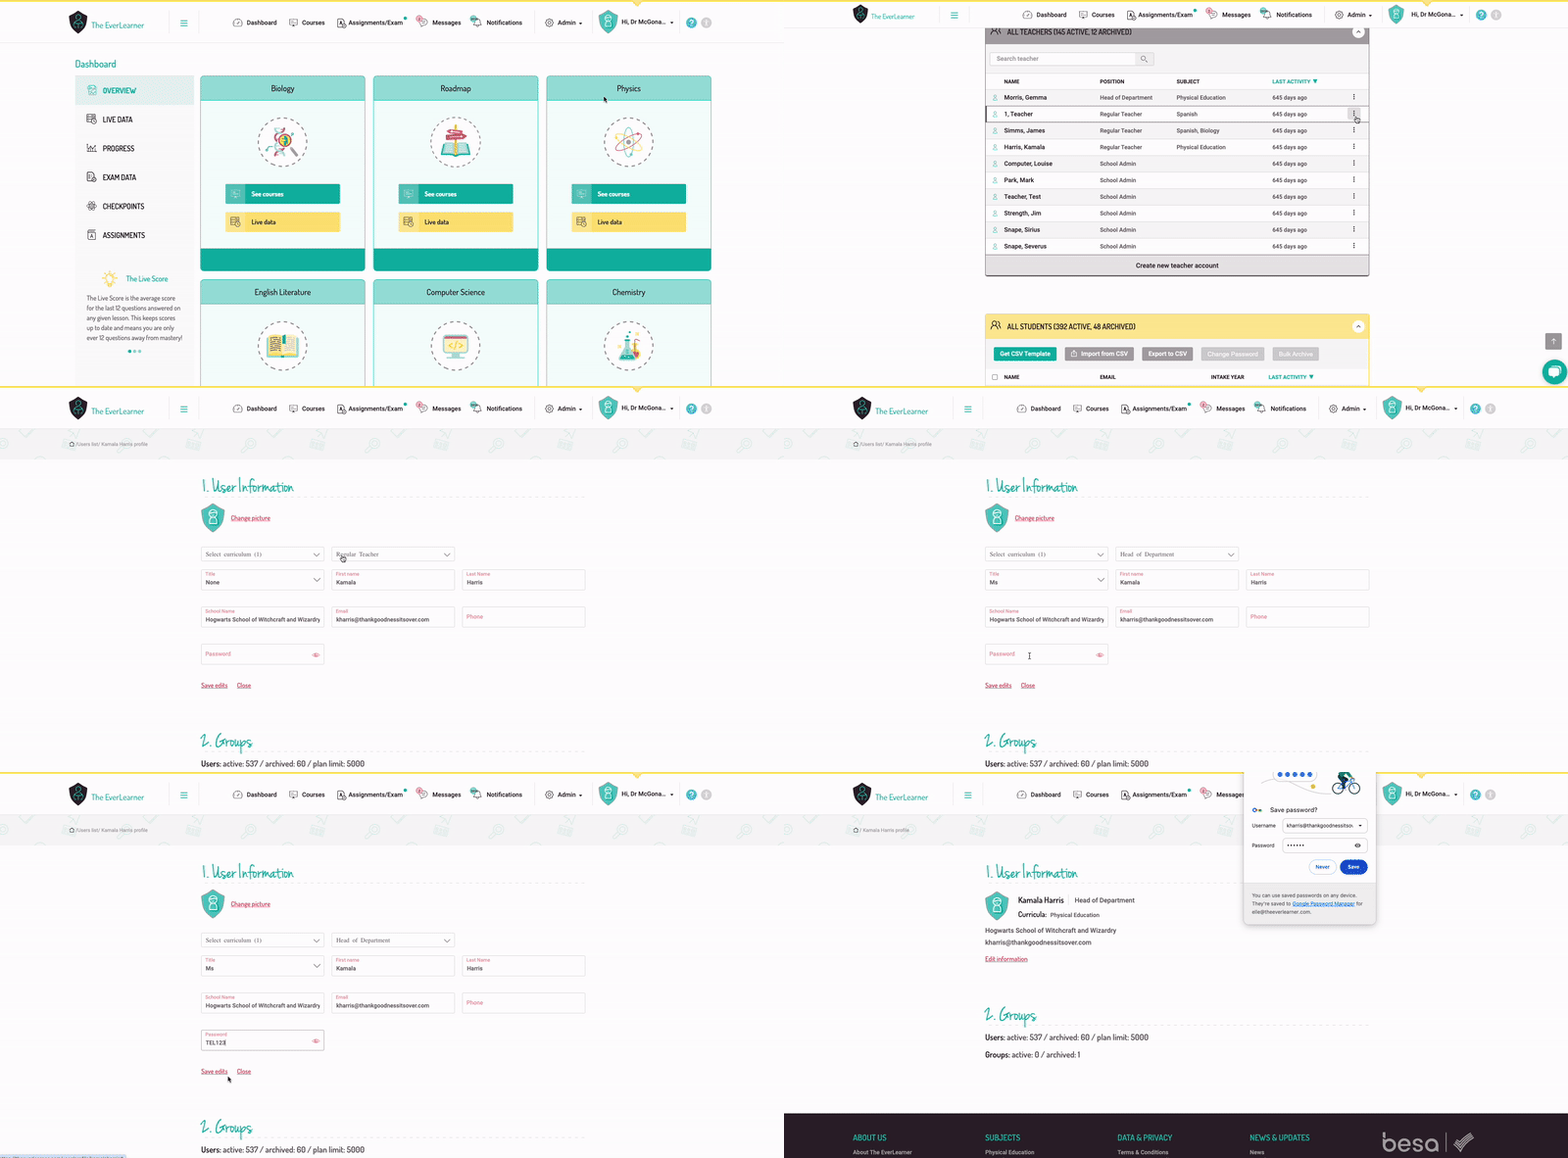
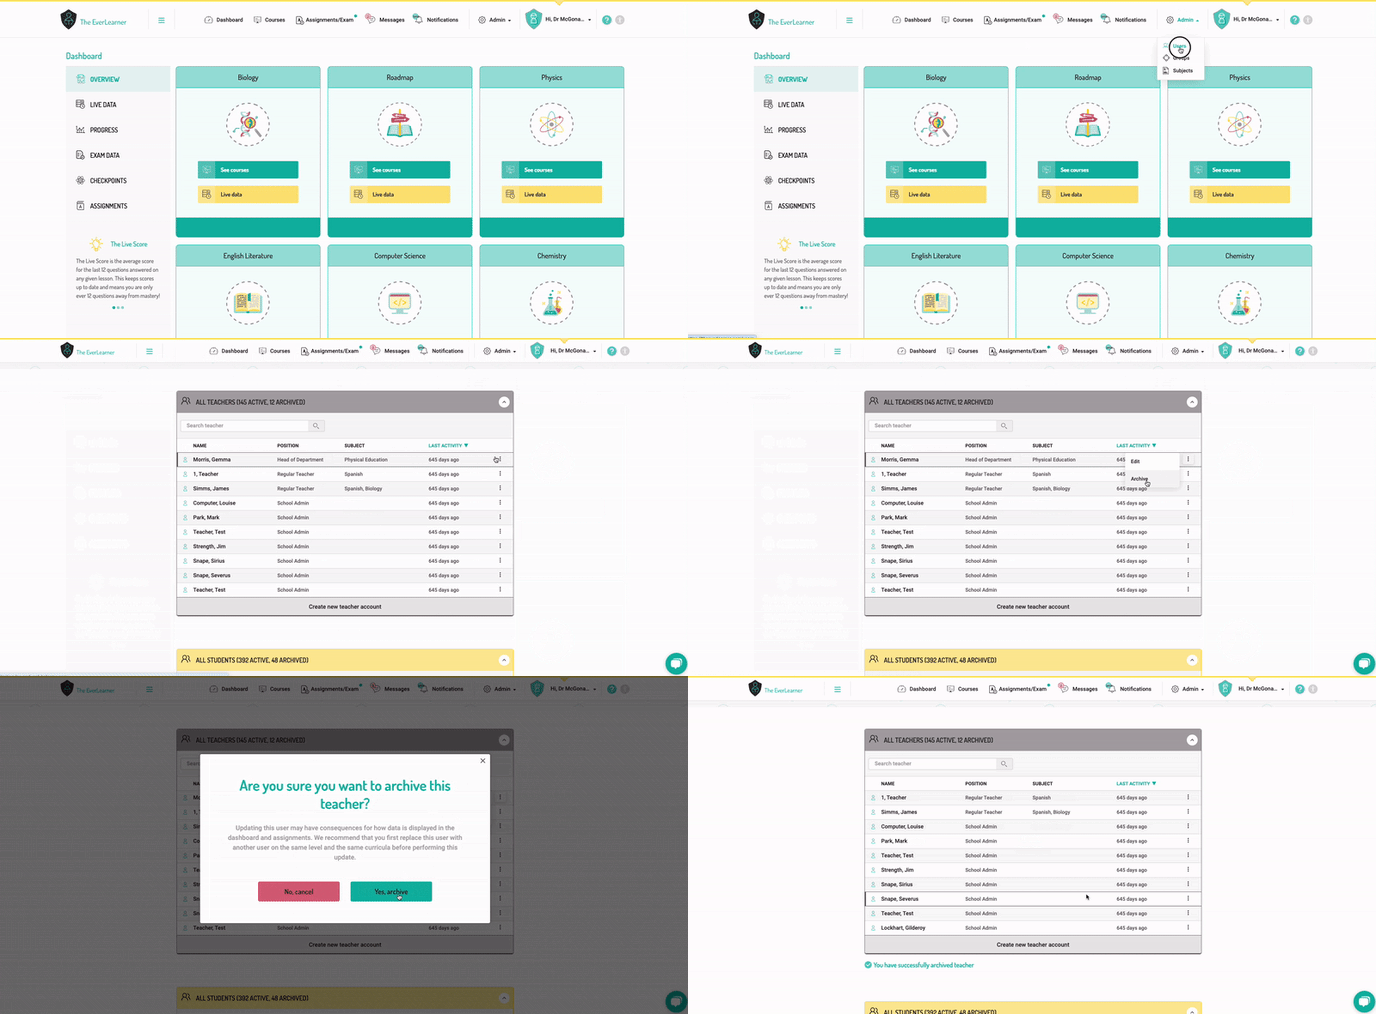
- Go to 'Admin > Users'.
- Scroll to the grey 'All Teachers' panel.
- Search for the teacher whose details you wish to edit, click the three-dot symbol to the right of their name, and choose 'Edit'. Note that a HoD can only edit teachers or other HoDs within their curriculum area. An admin's details can only be edited by themselves or by The EverLearner team.
- Click on 'Edit information'. You can now change the curricula assigned to the teacher and their role, as well as their name, title, email address and password. (Please note that if you change someone's password, you will need to notify them.)
- Click 'Save edits'.

- To archive a teacher, go to 'Admin>Users'. In the grey 'All Teachers' panel, clic the three-dot symbol to the right of their name and choose 'Archive'.

- Please note that archiving a teacher freezes their account, and they can no longer log in. They can be reinstated at any time within the following year, after which, if they remain archived, they will be automatically deleted from the site. (Archived users do not count towards the total user allocation.)
Managing students:
- You must be logged in and be an Admin or HoD.
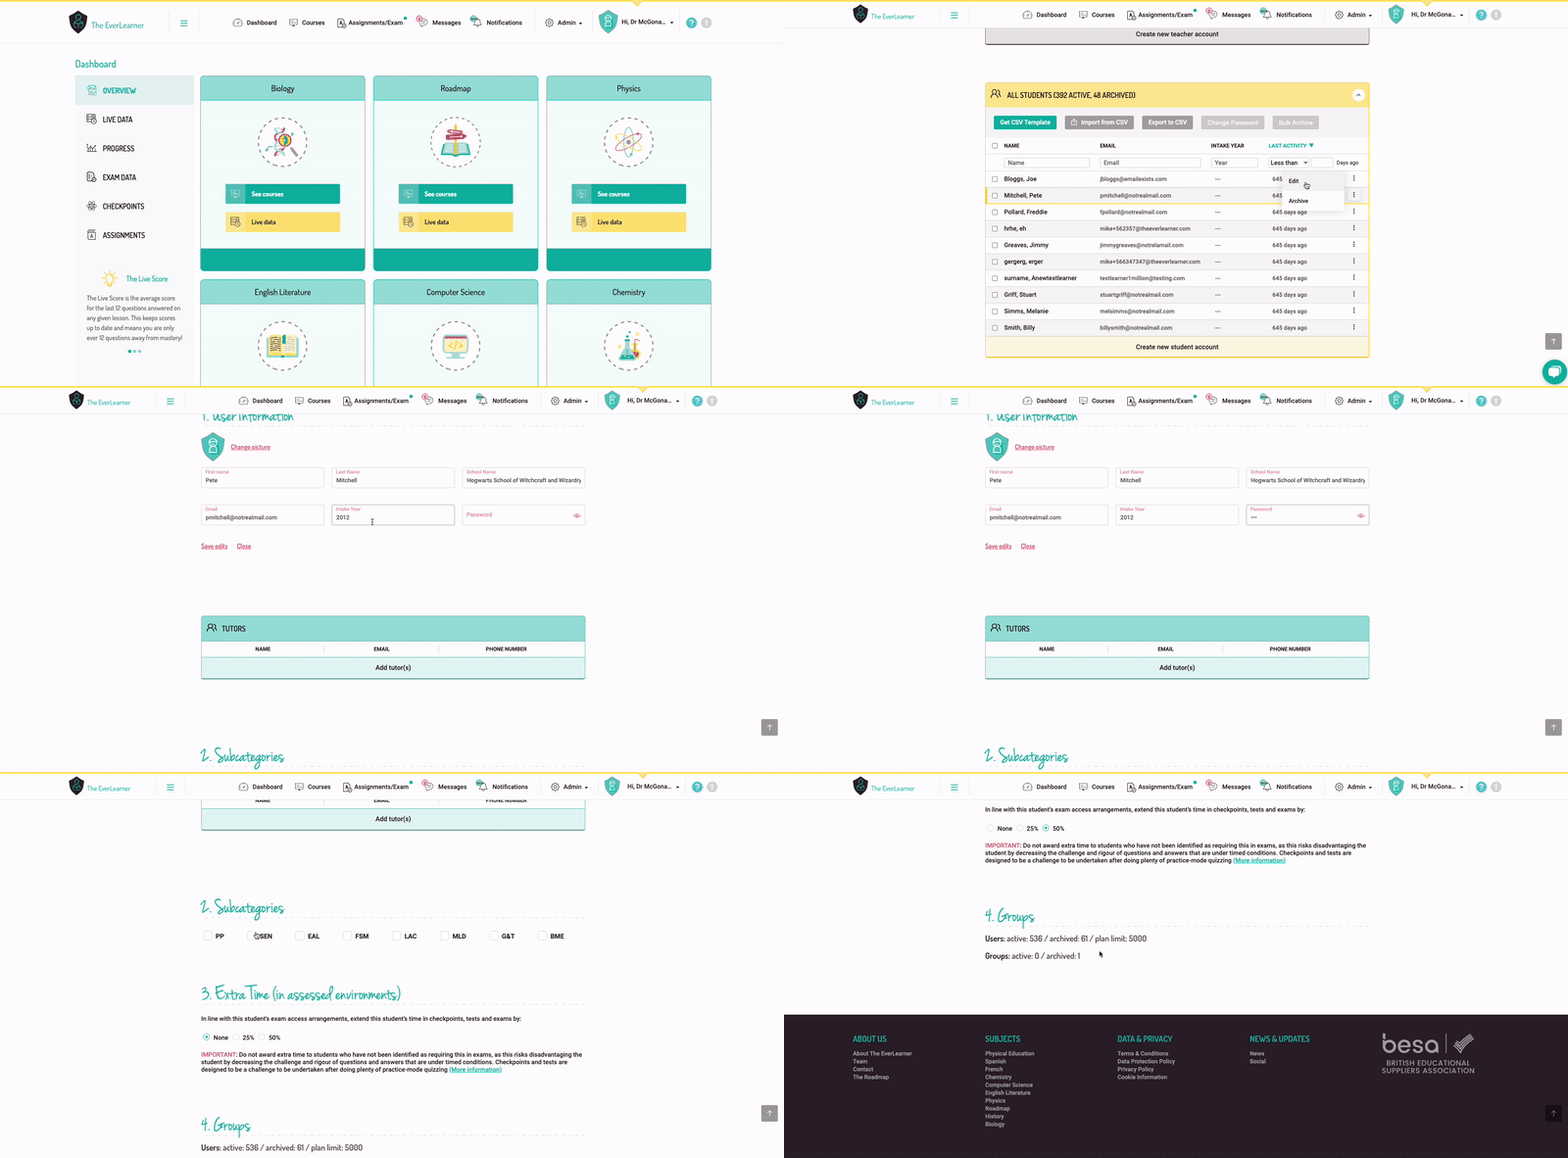
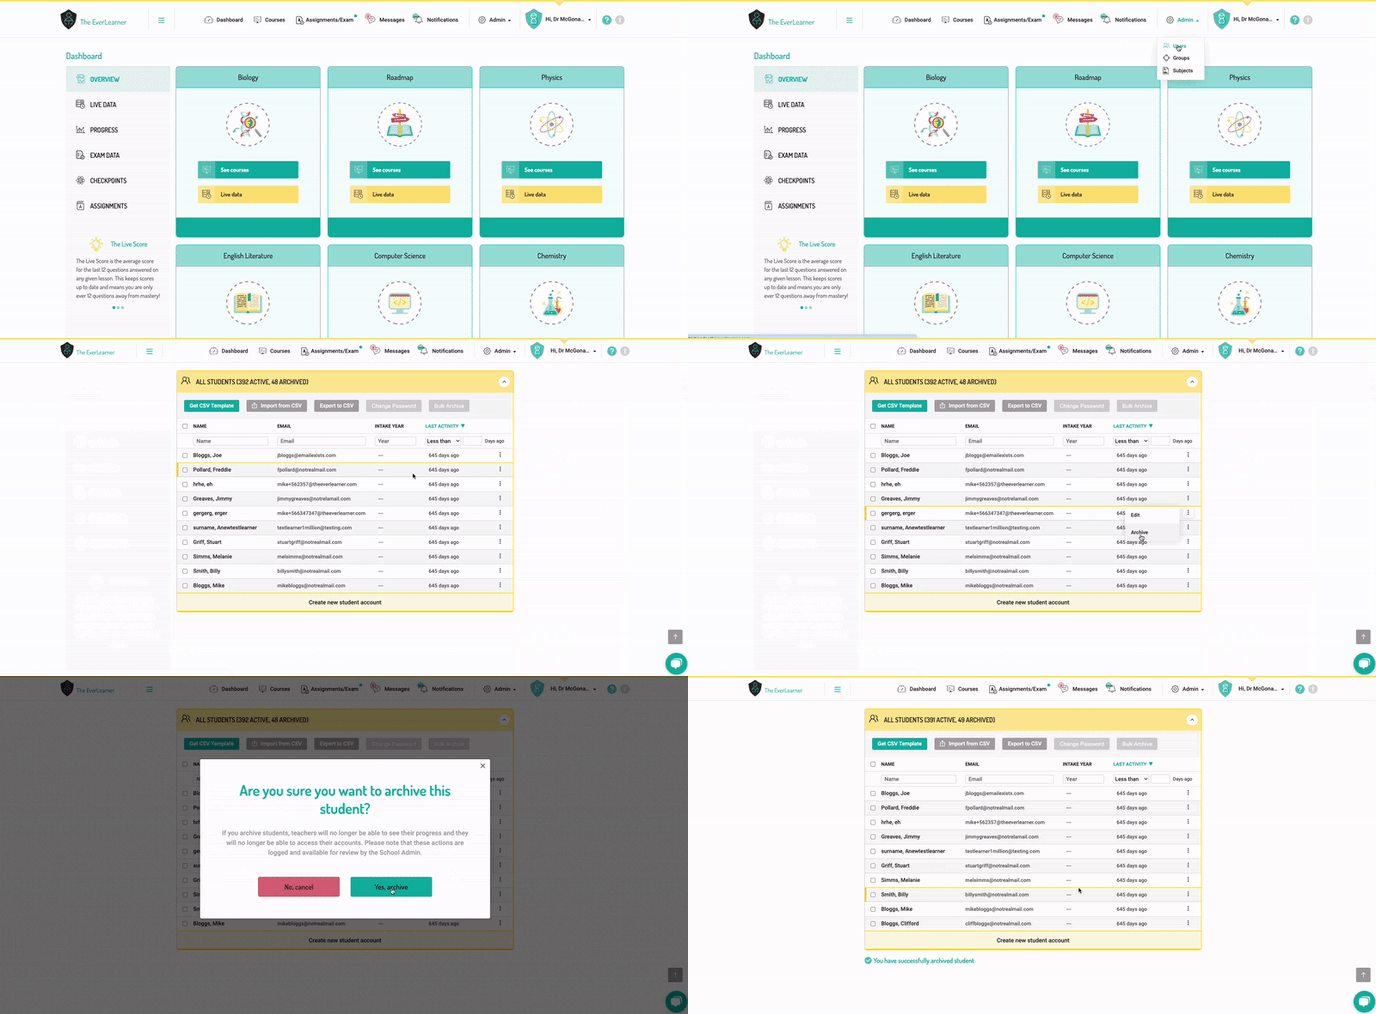
- Go to 'Admin > Users'.
- Scroll to the yellow 'All Students' panel.
- Search for the teacher whose details you wish to edit, click the three-dot symbol to the right of their name, and choose 'Edit'.
- Click on 'Edit information'. You can now change the student's name, email address and password. (Please note that if you change someone's password, you will need to notify them.)
- Click 'Save edits'.
- If you scroll down, you will also be able to flag the student as belonging to a particular subcategory (PP, SEN, EAL, FSM, LAC, MLD, G&T, BME). This is completely optional.
- Underneath this, you will see a panel called 'Extra Time'. It is possible to assign a student either 25% or 50% extra time, which applies to Tests and Exams. See Extra Time.

- To archive a student, go to 'Admin>Users'. Scroll to the yellow 'All Students' panel, click on the three-dot symbol to the right of their name and choose 'Archive'. Alternatively, to archive several students at once, tick the boxes to the left of their names and click the grey ‘Bulk Archive’ button at the top of the list.

- Note that archiving a student freezes their account and they can no longer log in. They can be reinstated at any time within the following year, after which, if they remain archived, their account will be automatically deleted from the site after 12 months of inactivity. (Archived users do not count towards the total user allocation.)
%20Square%20(1).png?width=190&height=189&name=Logo%20Solid%20(Green%20on%20Violet)%20Square%20(1).png)